
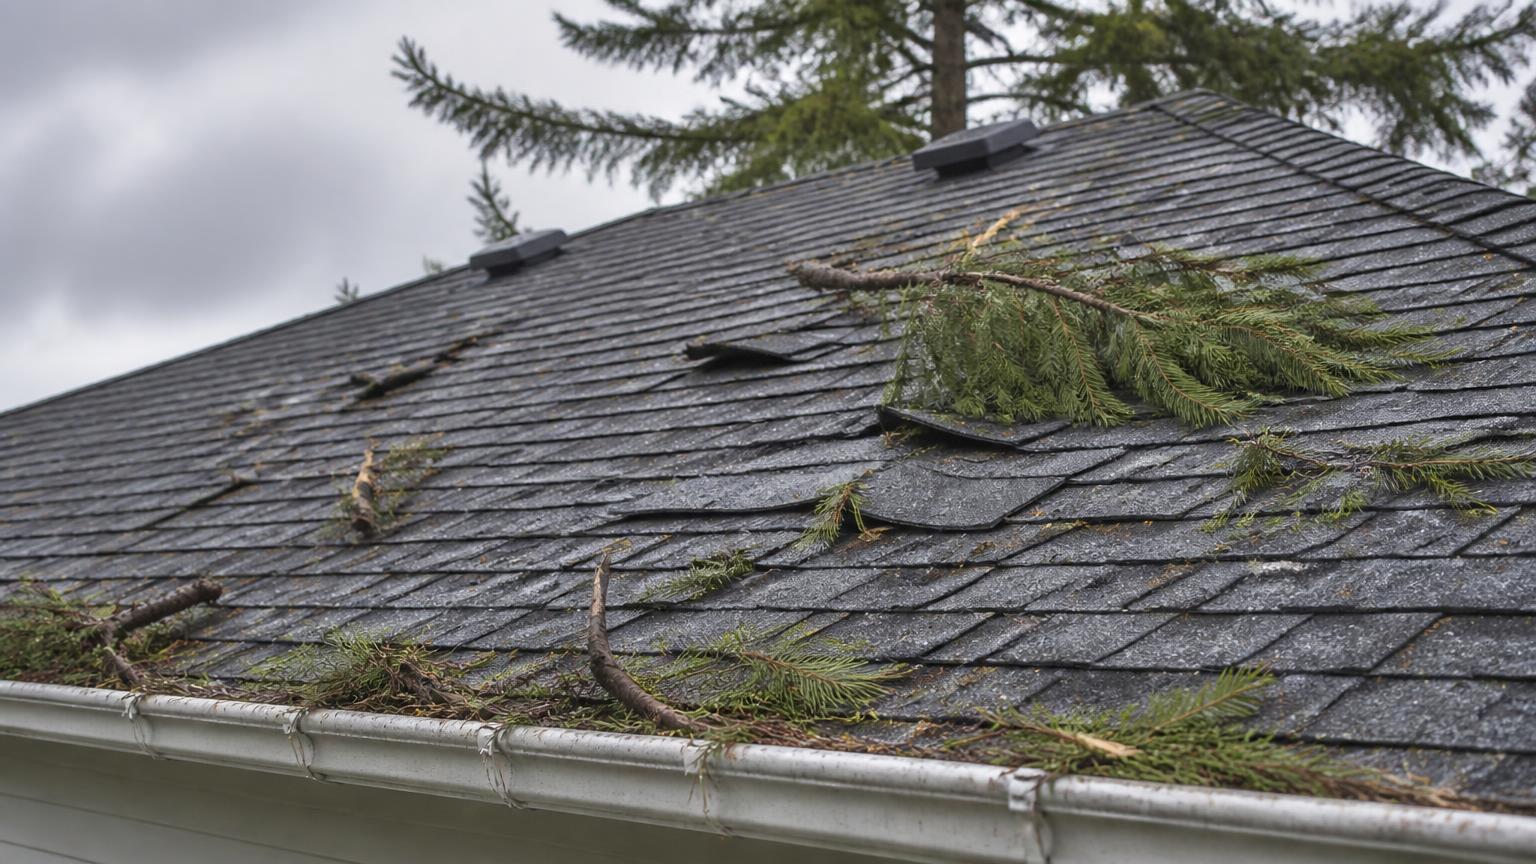
Our wind events usually arrive with the fall and winter rain, which is the worst possible pairing: the wind lifts or displaces something, and the rain immediately starts using it. The damage that turns into an expensive interior repair is rarely the dramatic kind — it's the two lifted shingles nobody noticed until February.
First: don't go on the roof
Everything worth checking after a storm can be seen from the ground, a window, or a stable ladder at the eaves. A wet roof with storm debris on it is the single most common way homeowners get hurt around their house. If you can't see it from the ground, that's what we're for.
Walk the perimeter and look up
- Shingles that look lifted, curled back, cracked, or gone entirely
- Ridge caps and hip shingles out of line
- Edge metal, drip edge, or fascia trim peeled away from the roof line
- Vent hoods, caps, or skylight trim shifted or missing
- Branches resting on the roof or wedged in a valley
Check the ground, not just the roof
The yard tells you a lot. Shingle fragments in the flowerbeds, a pile of granules at the bottom of a downspout, or pieces of metal trim on the lawn all mean something came off up there. Look in the gutters too — after a hard blow they're usually full of needles and small branches, and a blocked gutter during the next rainfall backs water up under the shingle edge.
Then go inside
Check ceilings on the top floor, the inside of exterior walls, around skylights and chimneys, and the attic hatch if you have safe access. You're looking for fresh discolouration, damp drywall, a musty smell that wasn't there before, or daylight through the deck. If water is actively coming in, follow our leaking roof steps — contain it, protect what's below, and don't climb up in the weather.
Document it while it's fresh
Take dated photos of everything you find, inside and out, plus wide shots that show the whole elevation. Note the date of the storm. Keep any repair invoices together. If you end up making an insurance claim, this record is the difference between a straightforward claim and an argument about whether the damage was pre-existing wear.
Findings that need a roofer now, not in spring
- Any active water entry, however small
- Missing shingles or exposed underlayment
- Displaced flashing at a chimney, wall, or skylight
- A branch that hit the roof hard enough to break shingles
- Edge metal or ridge that's loose and flapping in the next wind
A single displaced shingle is a same-visit repair. The same shingle left through a Lower Mainland winter can mean soaked decking, insulation, and drywall. That's the whole reason to look right after the storm rather than after the leak.
Reduce the odds before the next one
Have overhanging limbs cut back by an arborist, keep gutters and downspouts clear going into fall, and get displaced or brittle areas addressed before the wet season instead of during it. Our roof maintenance program covers the pre-season pass for homes and stratas, and the printable roof condition checklist gives you the same list to work through yourself.
If you found something
Send us the photos and we'll tell you honestly whether it needs attention now. Book a storm damage repair assessment and we'll get eyes on it safely.